Historical Background
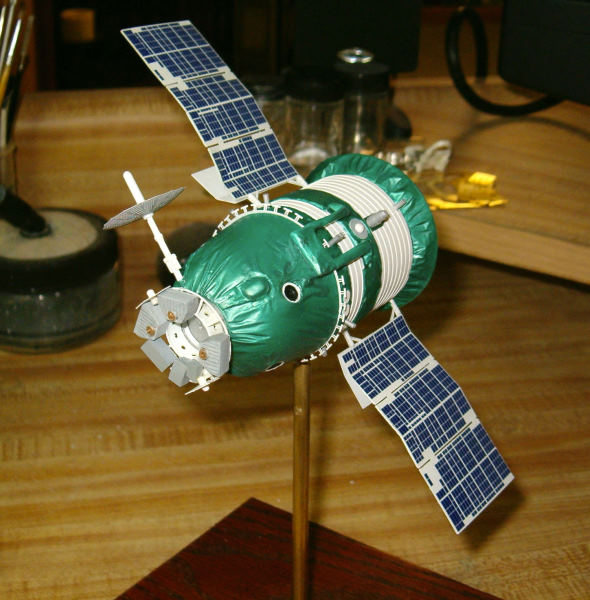
The Zond manned circumlunar spacecraft was a key part of the Soviet manned lunar program of the 1960s. Unlike the American lunar program, which used common hardware (the Apollo Command & Service Module) for lunar landing and lunar orbital missions, the Soviet Union chose to develop separate spacecraft with their own boosters for these two missions, creating two entirely separate programs. The Zond spacecraft, aka Soyuz 7K-L1, was designed to sling two cosmonauts around the moon and back in a non-orbital loop, with a mission duration of up to 7 days. The vehicle was basically a Soyuz spacecraft without the oval shaped Orbital Module, with a High Gain Antenna and “Support Cone” mounted on the Descent Module.
The booster chosen to take it to the moon was the then-new Proton. Contrary to the N-1 manned lunar landing program, the Proton booster worked well but the spacecraft failed in all but one of it’s test flights.
Between March, 1968 and October, 1970, a total of 5 unmanned test flights of the Zond spacecraft were flown. These were Zonds 4 thru 8. Of these, only the Zond 7 mission was completely successful.
Because of the failure of the Zond manned program to reach it’s objective, it’s existence became a state secret of the former Soviet Union, and no photos were seen of it in the west, prior to reentry, until a few years ago. There are still to my knowledge only two decent photos available of it to this day.
The Zond was 4.88 meters in length, 2.72 meters maximum diameter, and weighed 5,680 kg.
The kit
This is NewWare kit # NW020, the current price is $63.00 + S/H. The kit consists of 36 resin and 21 photoetched parts. There is also a decal sheet taken from the NewWare Soyuz model, of which only the solar panel decals are required for this kit. The resin is beautifully molded in a light yellow color, and the thermal blankets are molded in very nicely. I did not see any air holes. The photoetch is very thin and flexible, which was a big help when forming the High Gain Antenna into a dish. Resin parts are labeled with the letter “R”, PE parts with the letter “P”, and decals with the letter “D”. The instructions are very clear and follow a logical order. There are 7 steps in the instructions.
Buildup
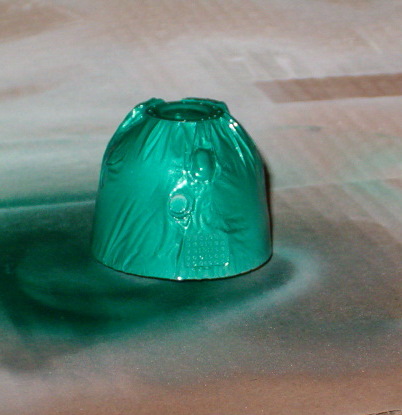
The buildup was very straight forward. I followed the instructions step by step. I began by painting the main 2 modules of the vehicle and parts R6 & 7 and the frustrum with a primer coat of flat white. This eliminated the problem of the yellow color of the resin showing through the green and white needed to correctly paint the model. Next I painted a 2nd coat of flat white over the radiators on the Service Module. I then masked the radiators and painted both the Service and Descent modules in their “Soyuz green” color. Getting the green color right was one of the biggest problems I had. The first color I chose, a square bottle of Testors green, was completely wrong. I was forced to strip off all the paint and do the whole thing over again. I consulted with an internet friend, Mr. Barry Davidoff, who shares my interest in Soviet spacecraft and who was also building his NewWare Zond at the same time, and he gave me a great “recipe” for Soyuz green. I used another square bottle of Testors paint, #1530 Jade Green, added a small amount of silver to the mix, and one drop of blue. A few adjustments in the lightness of the mixture came up with a really good match for the photo I used as a reference.
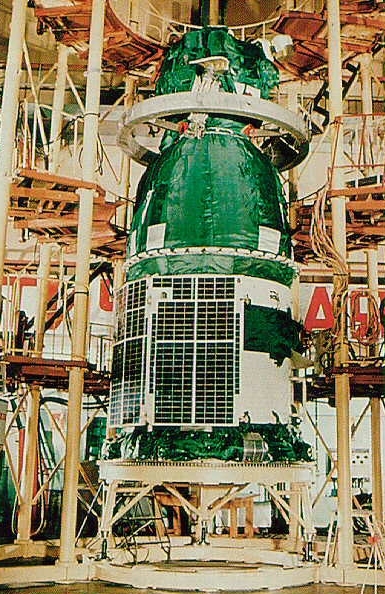
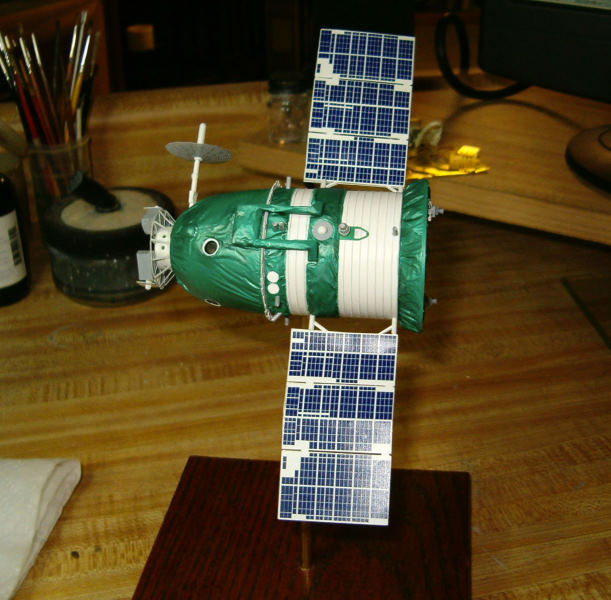
Above: Left: Color reference photo for the Zond
Right: The “Soyuz green” I was able to come up, “with a little help from my friends”
(The color appears lighter in this photo than it actually is)
In Step 1, I substituted 1/16” (1.6mm) Evergreen styrene rod for the small resin thrusters (part R18) supplied with the kit. This was my own choice, as I wanted the extra strength of the rod. I drilled out holes in the Service Module for the rods so they would have a strong bond with the vehicle.
In Step 2, I left off the 2 small assemblies made up of resin parts R26 and PE parts P18 until the vehicle was finished, because once they are installed you can’t sit the model on it’s base or these parts will be broken off.
Steps 3 & 4 were building the Solar Panels. I painted all the parts gloss white and the assembly went smoothly, except that 2 of the PE parts were mislabeled on the frets. PE part 4 for the left solar panel is actually PE part 9 for the right one, and vice versa. Carefully pre-fitting the parts before gluing paid off big dividends here! I used Zap-A-Gap super glue for this assembly (and the entire buildup), but someone told me they’d used 3M Spray Adhesive to glue the “Z” shaped supports onto the arrays, something I will definitely try next time I’m in a similar situation.
I was a little nervous going into Step 5, building the “Support Cone” because the main part of the assembly is a spindly piece of PE that required a lot of bending, but small grooves etched into the PE made bending it easy!
Step 6 in the instructions involves building and installing the High Gain Antenna. Again, I was a little concerned here because you have to take the PE dish for the antenna and bend it into a concave bowl shape. After some thought I scrounged around in my kitchen and found a small ladel. I placed the PE part into the bowl of the ladel and simply mashed it down with my thumbs, forming it into the correct shape. This process caused 2 small wrinkles in the PE, but because NewWare’s PE is so thin and malleable it wasn’t too much trouble to take the blunt end of a scalpel and “iron” the wrinkles out, just like a piece of laundry.
The biggest problem I had with the actual parts of the model was when I began to build the High Gain Antenna mast. Resin part R21 was very delicate and broke while I was handling it. I decided to rebuild it from scratch, which was fairly simple using some styrene rod and a few odds and ends. I chose to use styrene rod with a metal core, as this would strengthen the mast and make it easier to mount onto the Descent Module. The results were very good.
Before beginning the final assembly, I picked out where I would place the mounting rod for the model and drilled the hole for it, as handling it while I was drilling this hole would be much easier and less potentially damaging now than later when the more delicate subassemblies were installed.
Step 7 is the final assembly. I knew that installing the solar arrays would be a key part of the final assembly, so I gave it some thought before attempting it. The instructions call for bending the aft brackets 90 degress and gluing them flush to the surface of the Service Module. The forward brackets are supposed to be installed into holes that you drill into the sides of the Service Module. Instead, I used .060” (1.5mm) Evergreen
half round styrene rod, glued one piece to each of the 2 brackets on each panel, then glued them straight into the holes I drilled into the sides of the Service Module. This resulted in what I think are much sturdier solar arrays.
Acknowledgements
I would probably still be scratching my head trying to figure out what shade of green to use on this model if it wasn’t for Mr. Barry Davidoff. Also, I have to give a big “Thank You” to Mr. Tomas Kladiva and Mr. Andi Weustner of NewWare models for creating this kit, which is a welcome addition to my collection of Soviet spacecraft. Tomas and Andi also supplied information and advice on building the model, as well as one of the photos I used as a reference.